I’ve just replaced all three 3rd/4th gear synchro springs in the gearbox with the gearbox still in place in the vehicle. There is already a guide kicking around online on how to do this, stating that the seatbox needs to be lifted four inches, however I can confirm the seatbox does not have to be moved at all.
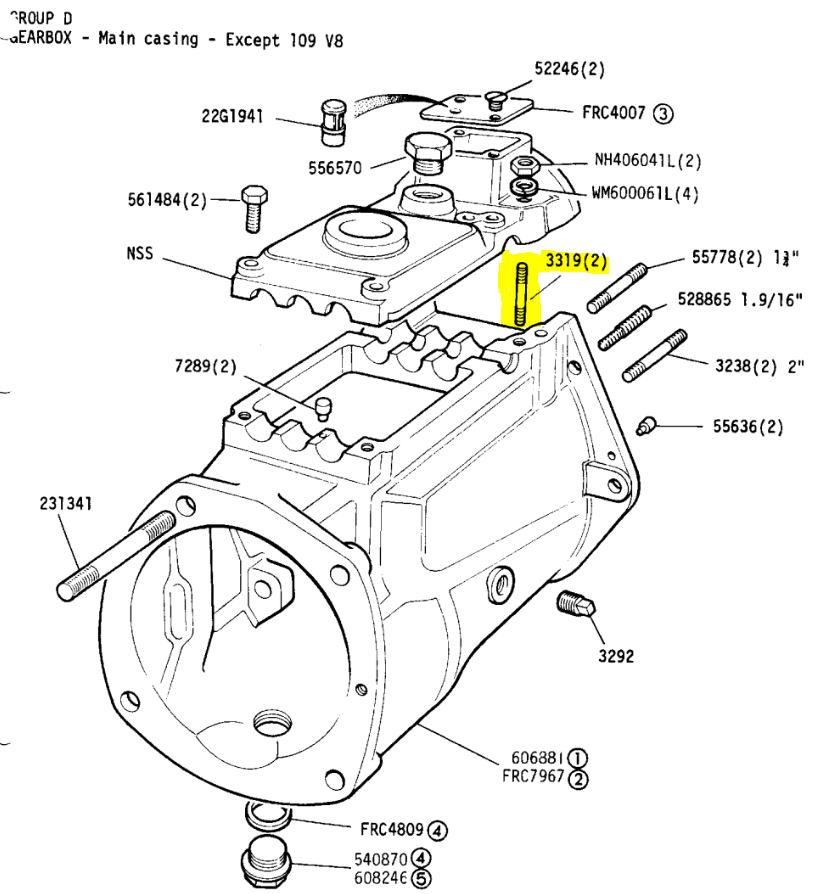
The reason for lifting the seatbox appears to be the space needed to lift the gearbox top cover over the two studs highlighted in the image. However these 3/8 UNF studs can be removed by using two ‘half’ nuts locked together and unwinding the the stud out of the case. There is not enough stud showing to get two standard nuts on. Once these two studs are removed the gearbox top cover does not need any ‘headroom’ when lifting off and therefore the seatbox does not need moving at all.
Engage 3rd gear and then remove the gearstick.
Carefully remove the two brackets on either side that hold the springs against the detent balls. Once you’ve removed the brackets and the springs, dab a little grease in the holes to stop the detent balls rolling out and disappearing.
Once you’ve unwound the 3/8 studs mentioned above (3319) then you can remove the gearbox top cover. Make a note of where the detent balls are situated before removing them. There is a spring under the large central bolt (556570) so be careful it doesn’t pop out when removing.
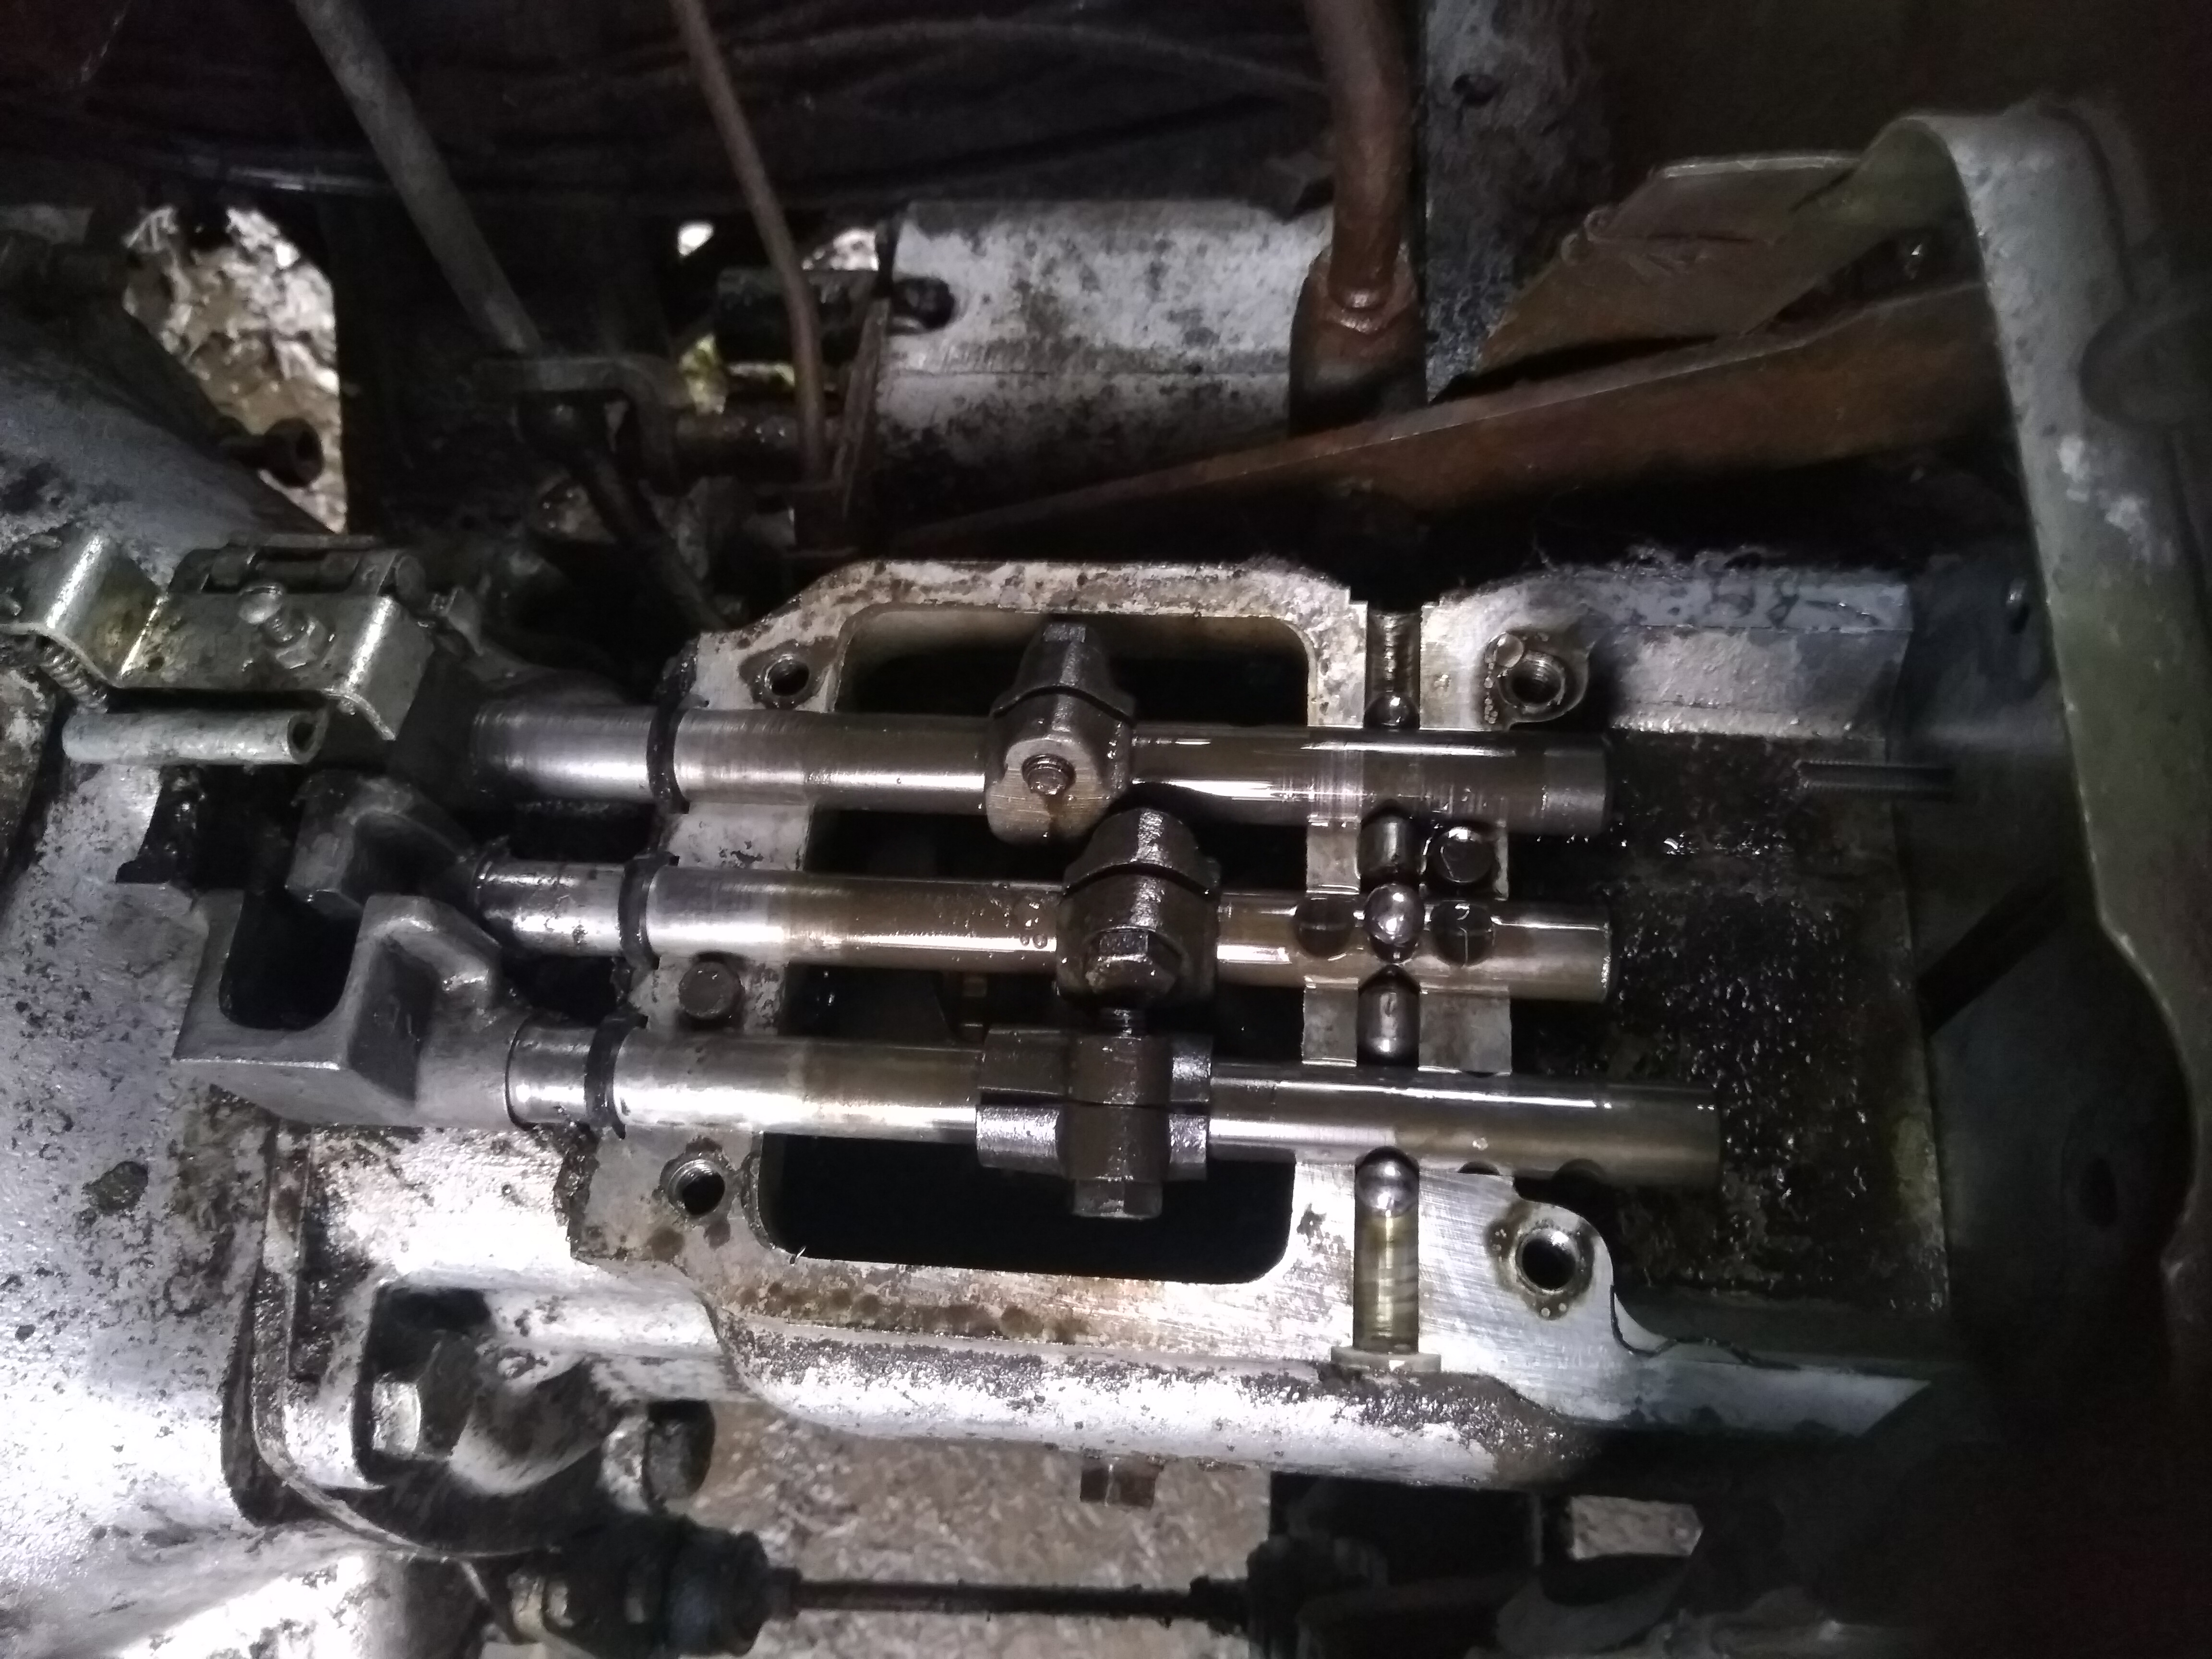
Now you need to lift the selector rods off, before you do make sure you note where the selectors sit in the gearbox. Lifting them out takes a bit of wiggling but it is straightforward.
Once the selectors are out of the way you will have a good view of the 3/4 Syncro unit. Put the transfer box in neutral and you can turn the gears and see where the spring/s are missing. In my case all three springs were missing, I’ve been double de clutching for years, had I known it was these easy to replace the springs I would have done it years ago.
Push the middle selector plate of the synchro all the way forward toward the bellhousing. At this stage you will need some long reach long nose pliers with a 45 degree angle.
Using the pliers, try to push the end of the spring through the small rectangular space in the centre of the synchro where the spring should sit. At this stage I had to use a long thick leather needle with a wooden handle that I used to prod the end of the spring through while wiggling the spring into place with the pliers. It is a very tight angle, I don’t think I would have been able to get the spring through without pushing at one end and wiggling the other.
Once the end of the spring is through the hole and the spring is in line but not pushed all the way across into place, pull the middle selector plate backwards over the spring and the spring will then click into place. You may need to use the pliers to lever the middle of the syncro over as it is quite stiff once the springs are fitted. Make sure to check the end of the spring is correctly in place at the forward end as it may need another prod over the lip.

The first spring took me a while, however the other two were a doddle once I’d understood how to do it.
Refitting is a just a reversal of removal. The below image will assist with refitting the sector forks in the right place.